If you’re using Hopin, you can integrate Slido into any area of the Hopin event - be it reception, stage, session, or expo booth.
This will allow your attendees to interact with Slido directly from Hopin.
As an admin, you cannot manage Slido from Hopin. You’ll still need to do so using another browser tab or device.
In this article:
Get your slido joining link
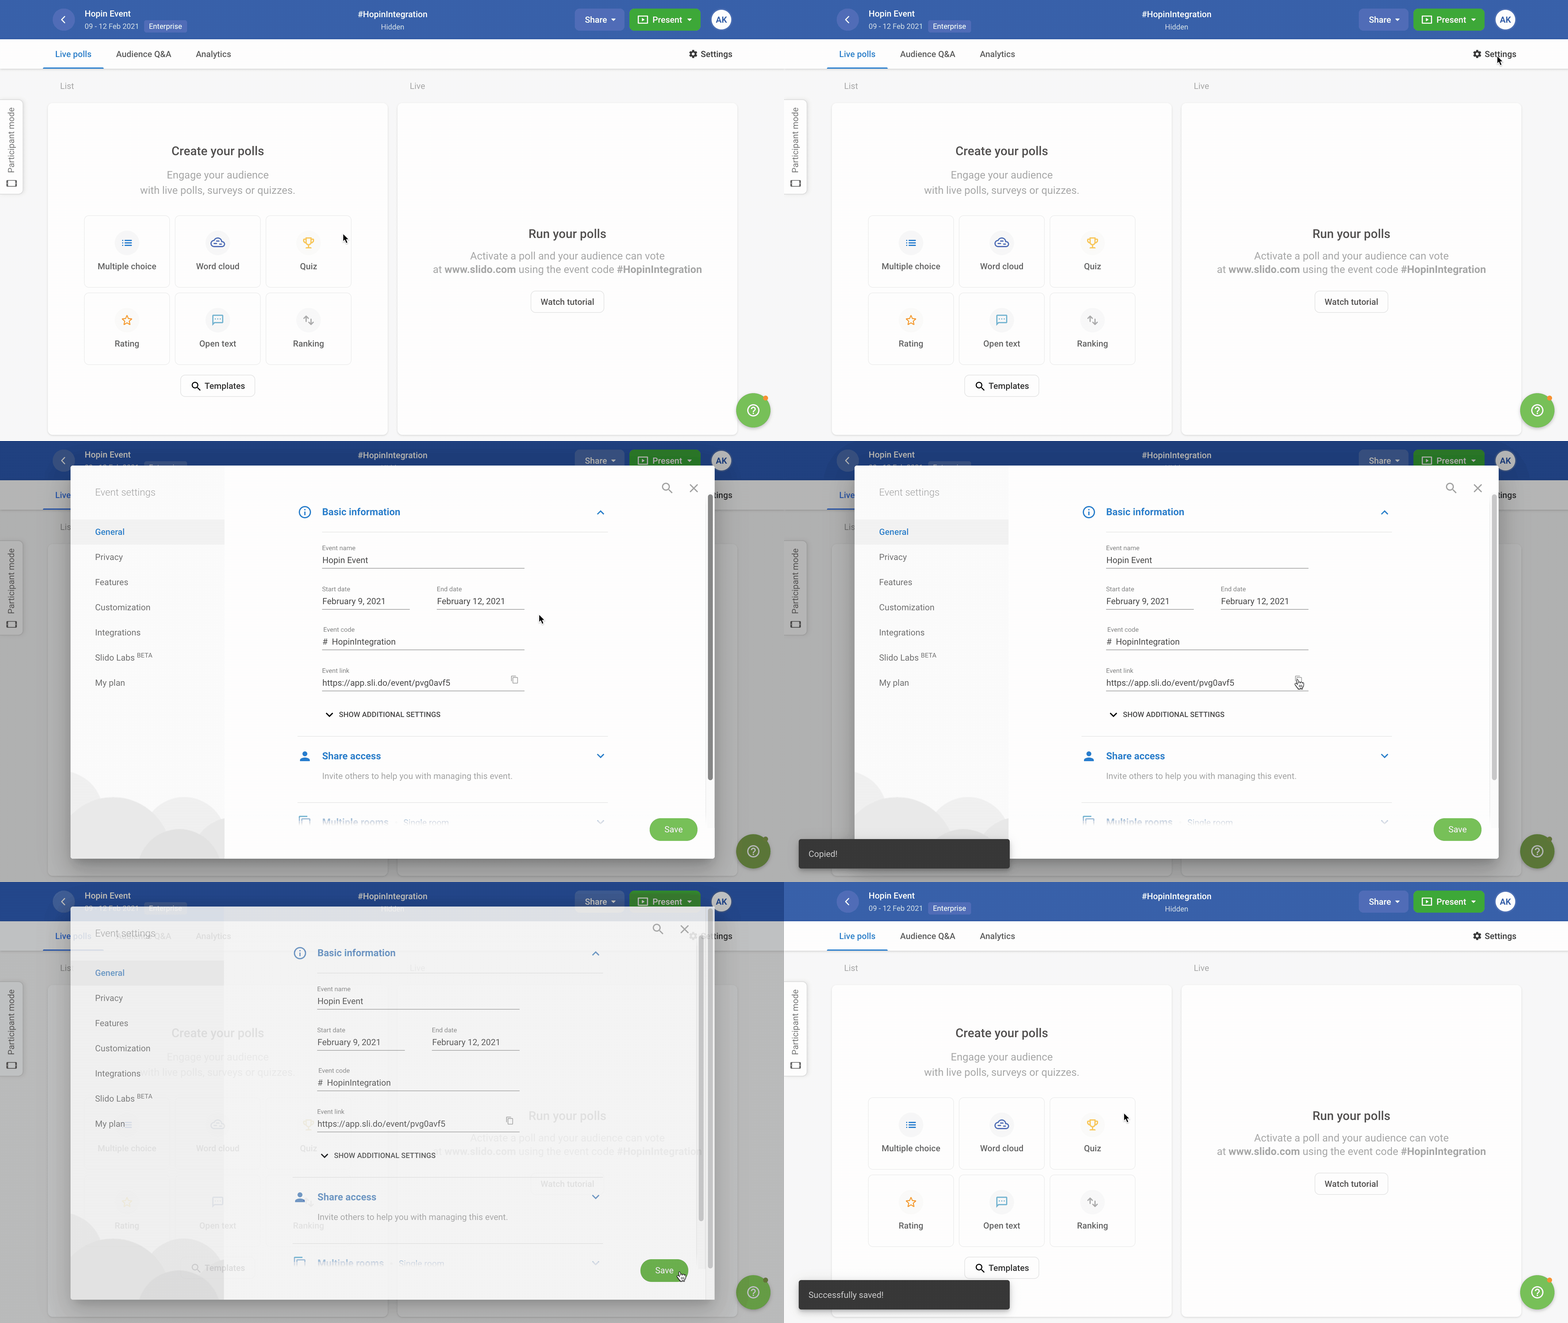
Before adding Slido into Hopin, you’ll need to create a slido first and get its unique Joining link.
To do so:
- In Slido, open your slido settings
- Copy Joining link

Using Multiple rooms? Learn how to get the link for a specific room in this article.
Enable Slido integration in Hopin
When logged into Hopin:
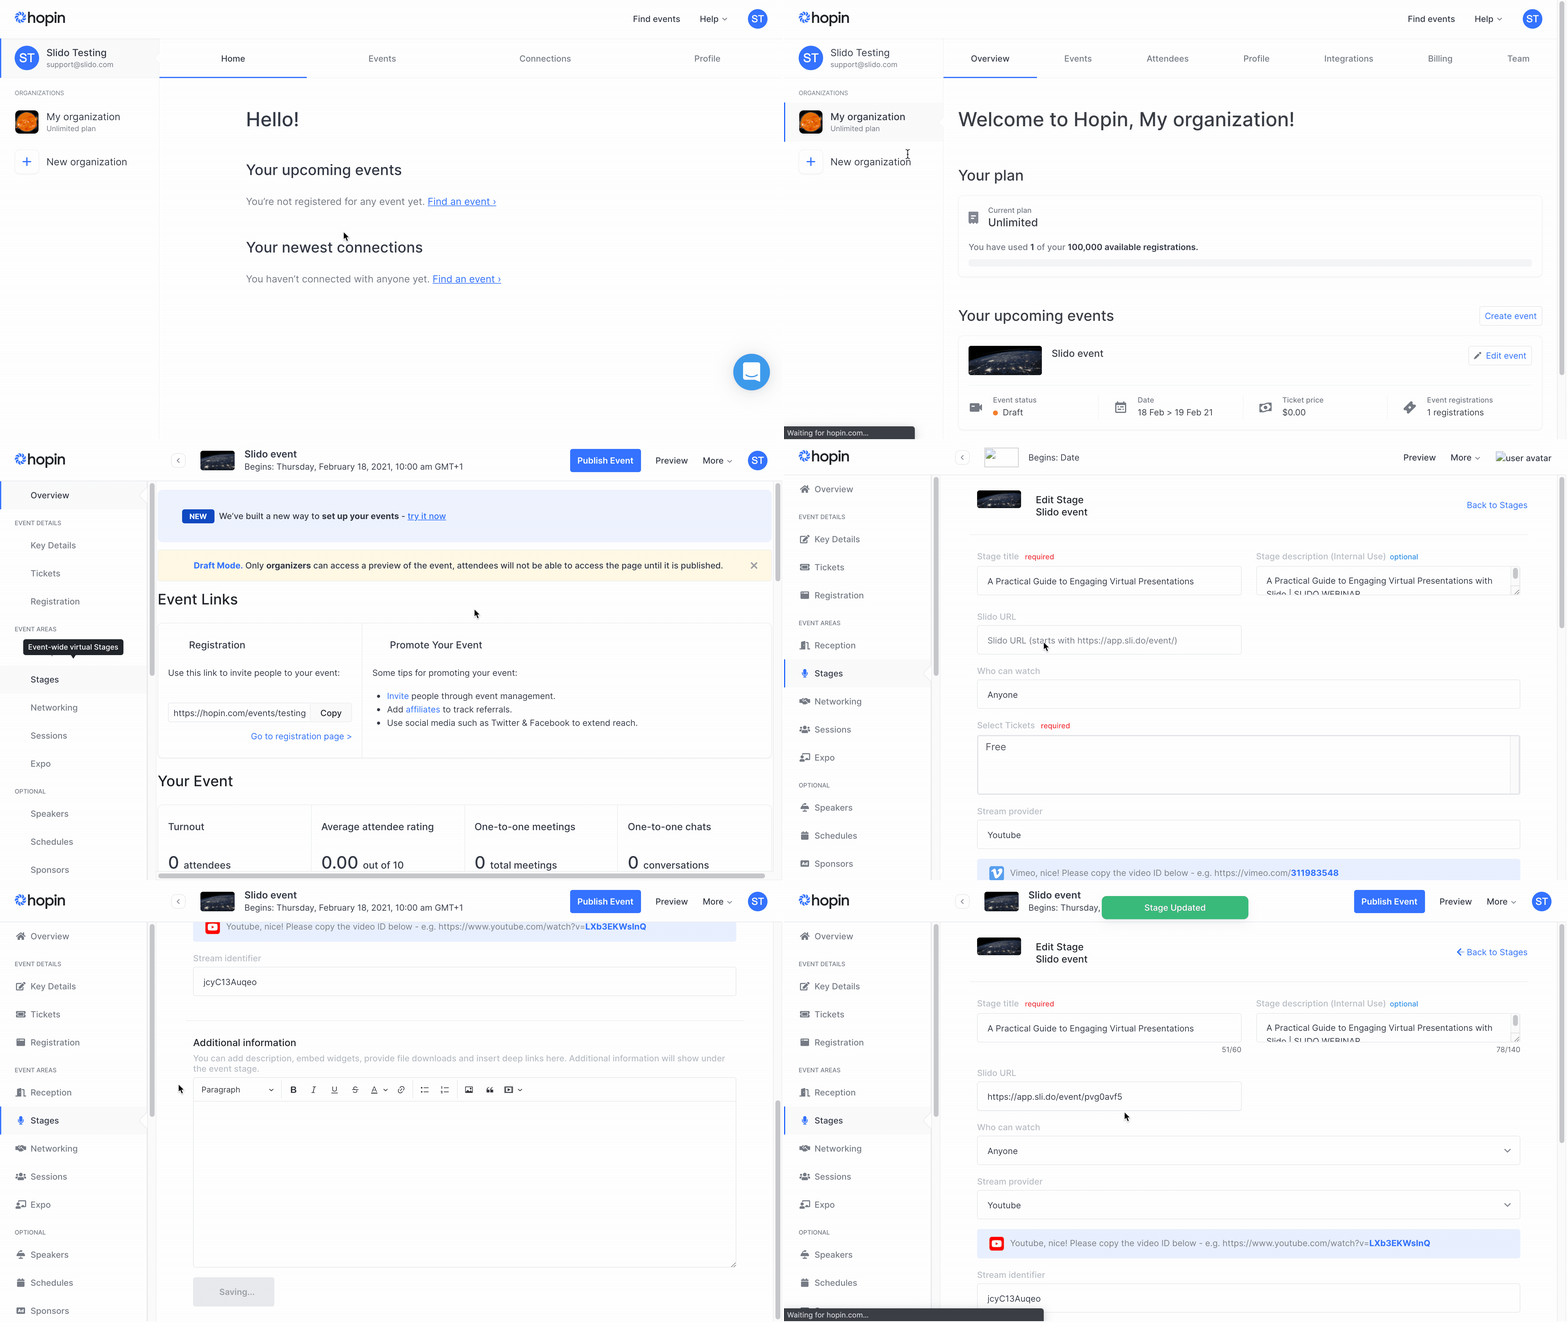
- Select an Organization on the left and click Integrations
- Find Slido and tick Enabled
- Hit Save at the bottom of the page
Add Slido to your Hopin event
Under the Events tab, select your Hopin event in which you’d like to use Slido.
Afterwards:
- Navigate to the specific stage or session in your event that you'd like to add Slido to
- Paste the slido Joining link into the Slido URL field
- Hit Save at the bottom

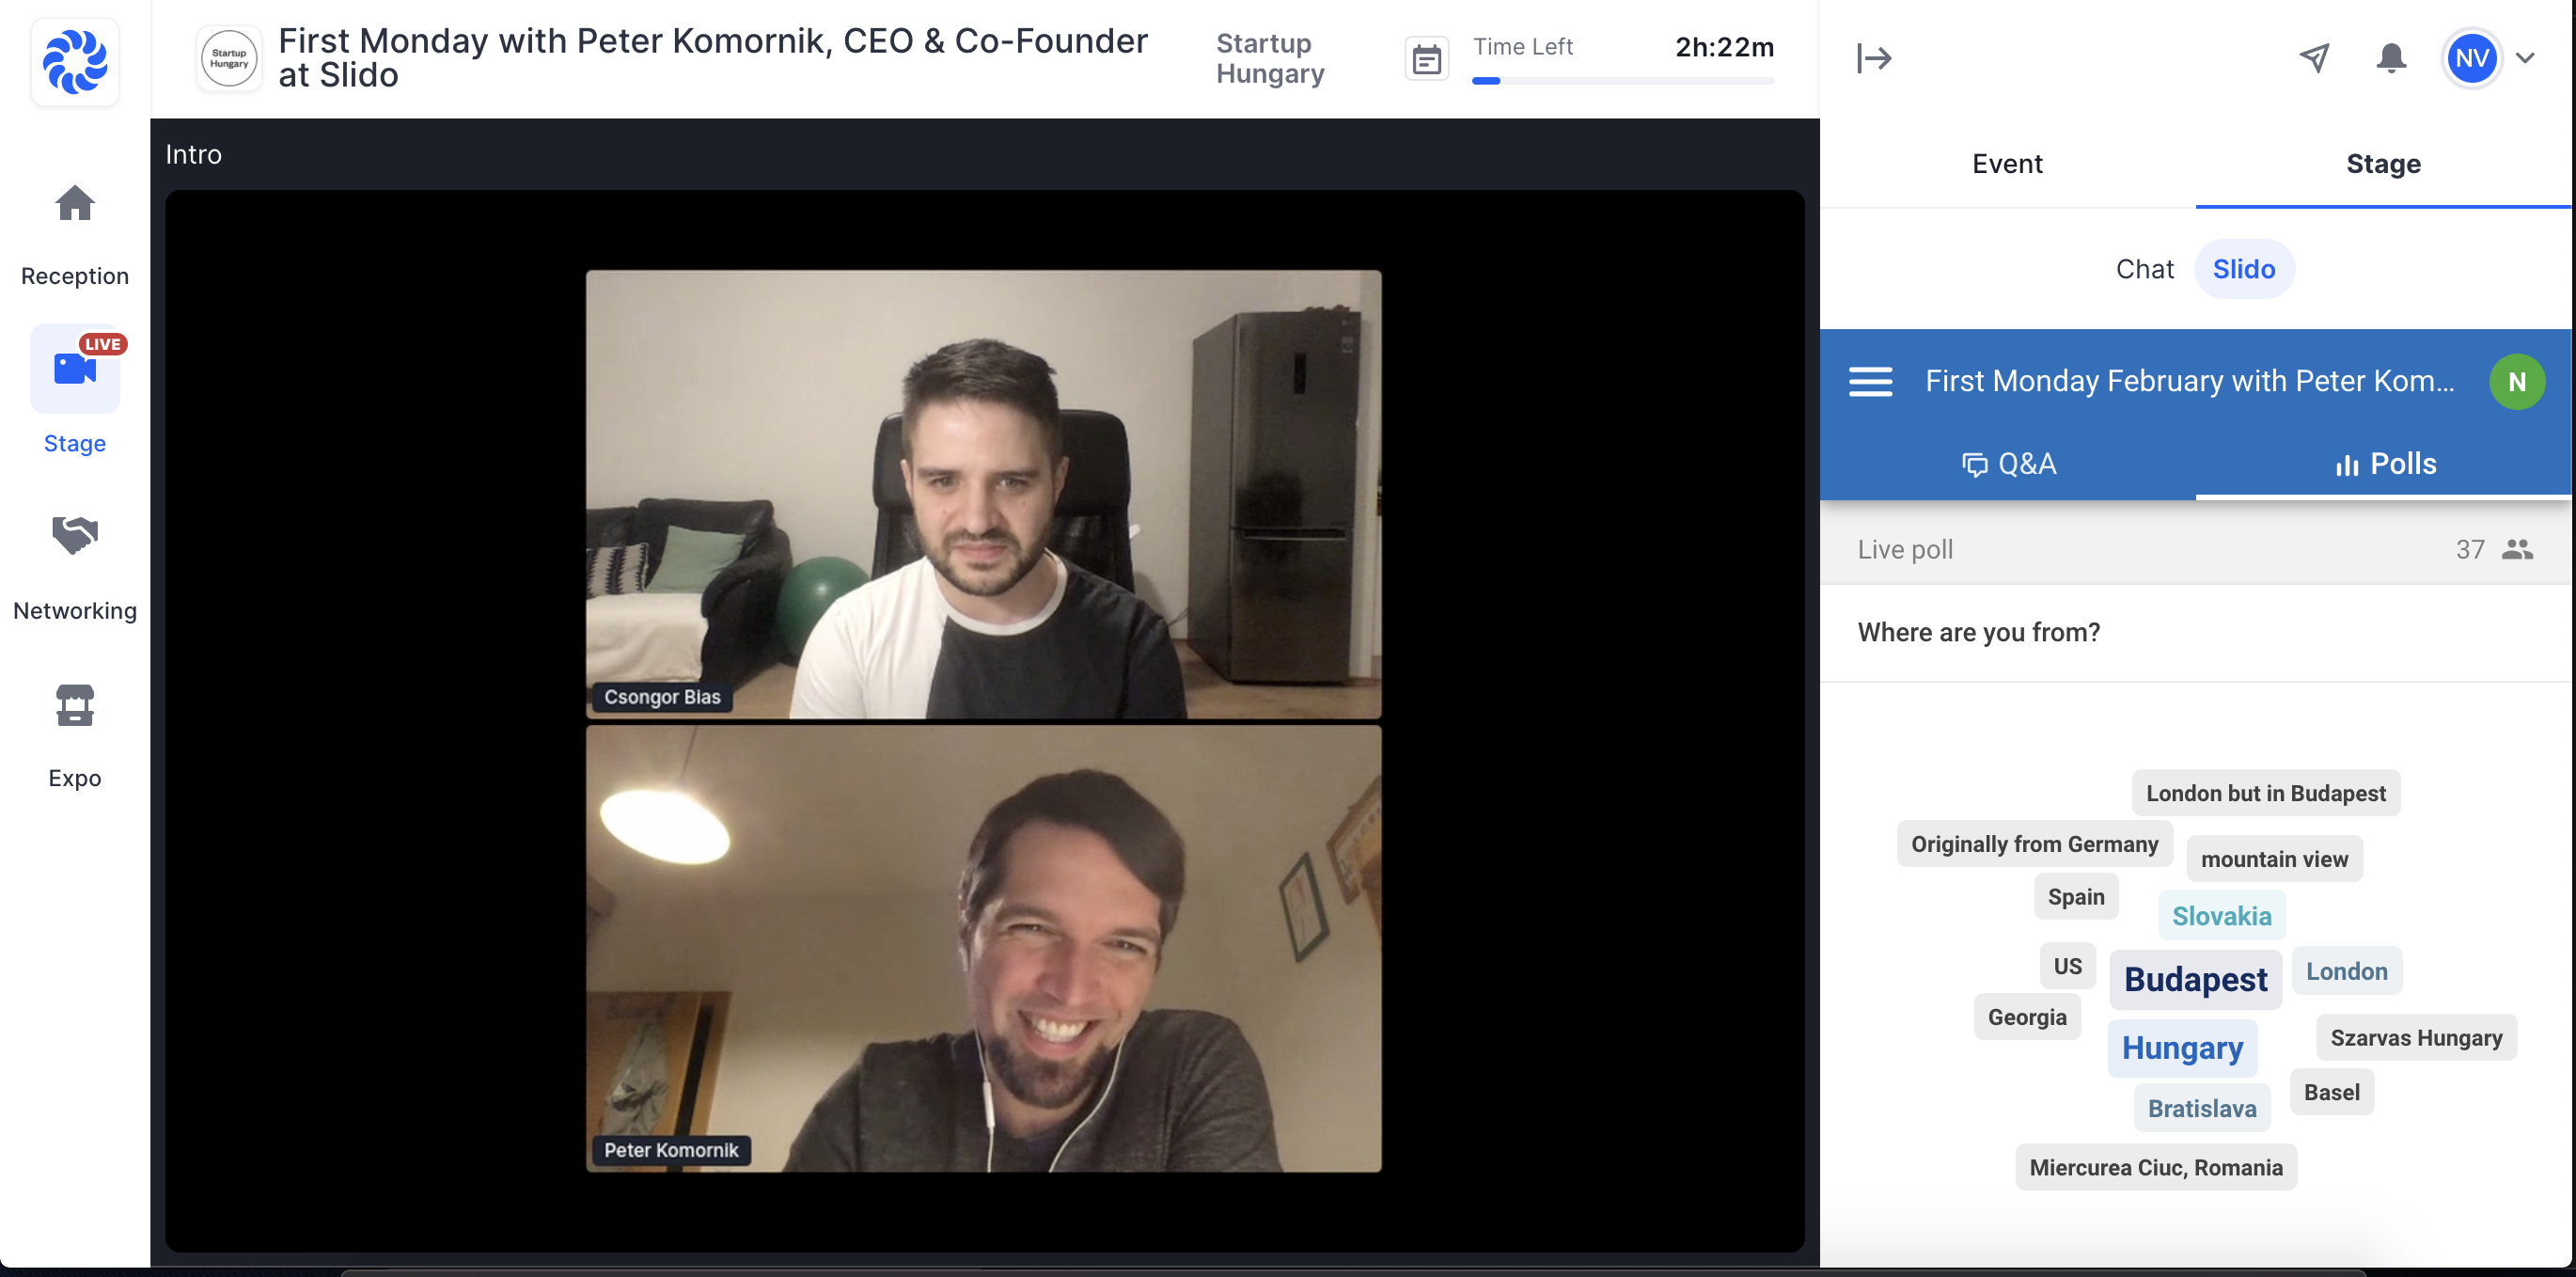
How it works for your attendees
You can see how Slido works for your attendees under the Preview tab. They’ll be able to interact with Slido right next to your video or live stream once you go live.

Get started with Hopin here.
Curious about more?

