

Multiple rooms in Webex enables your participants to interact with different topics, presentations, or brainstorming sessions while using a single slido.
Create your rooms in advance when you want to use Slido for regular meetings using the same slido – or use them for concurrent tracks during your events.
Available in paid Webex plans.
To make sure you can use Slido in Webex, check the current requirements and limitations in Webex Meetings and Webex Webinars first.
Slido is not supported in Webex breakout rooms.
In this article:
Create and activate multiple rooms
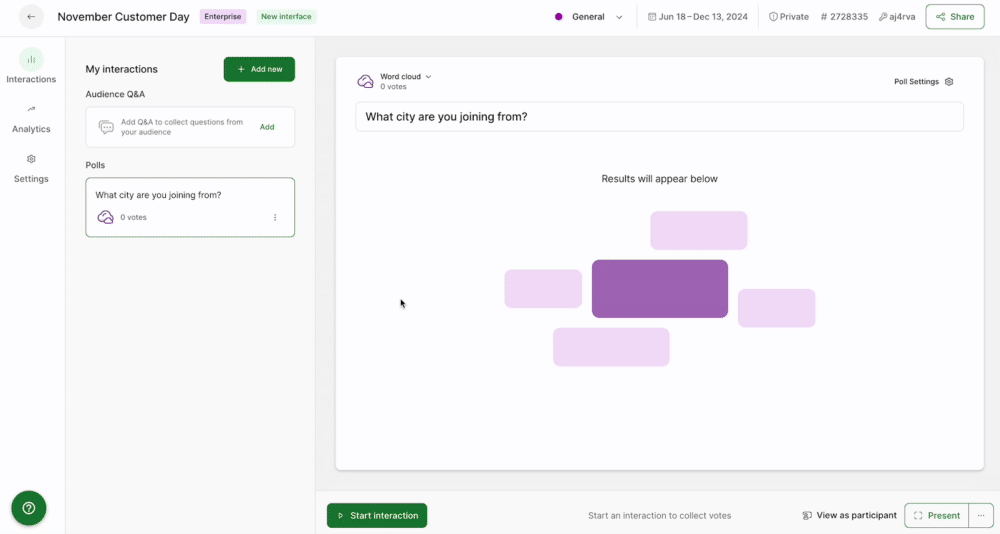
To start, go to slido.com, click Log in > Login with Webex and enter your Webex credentials. Then open an existing slido or create a new one.
Once you’re in:
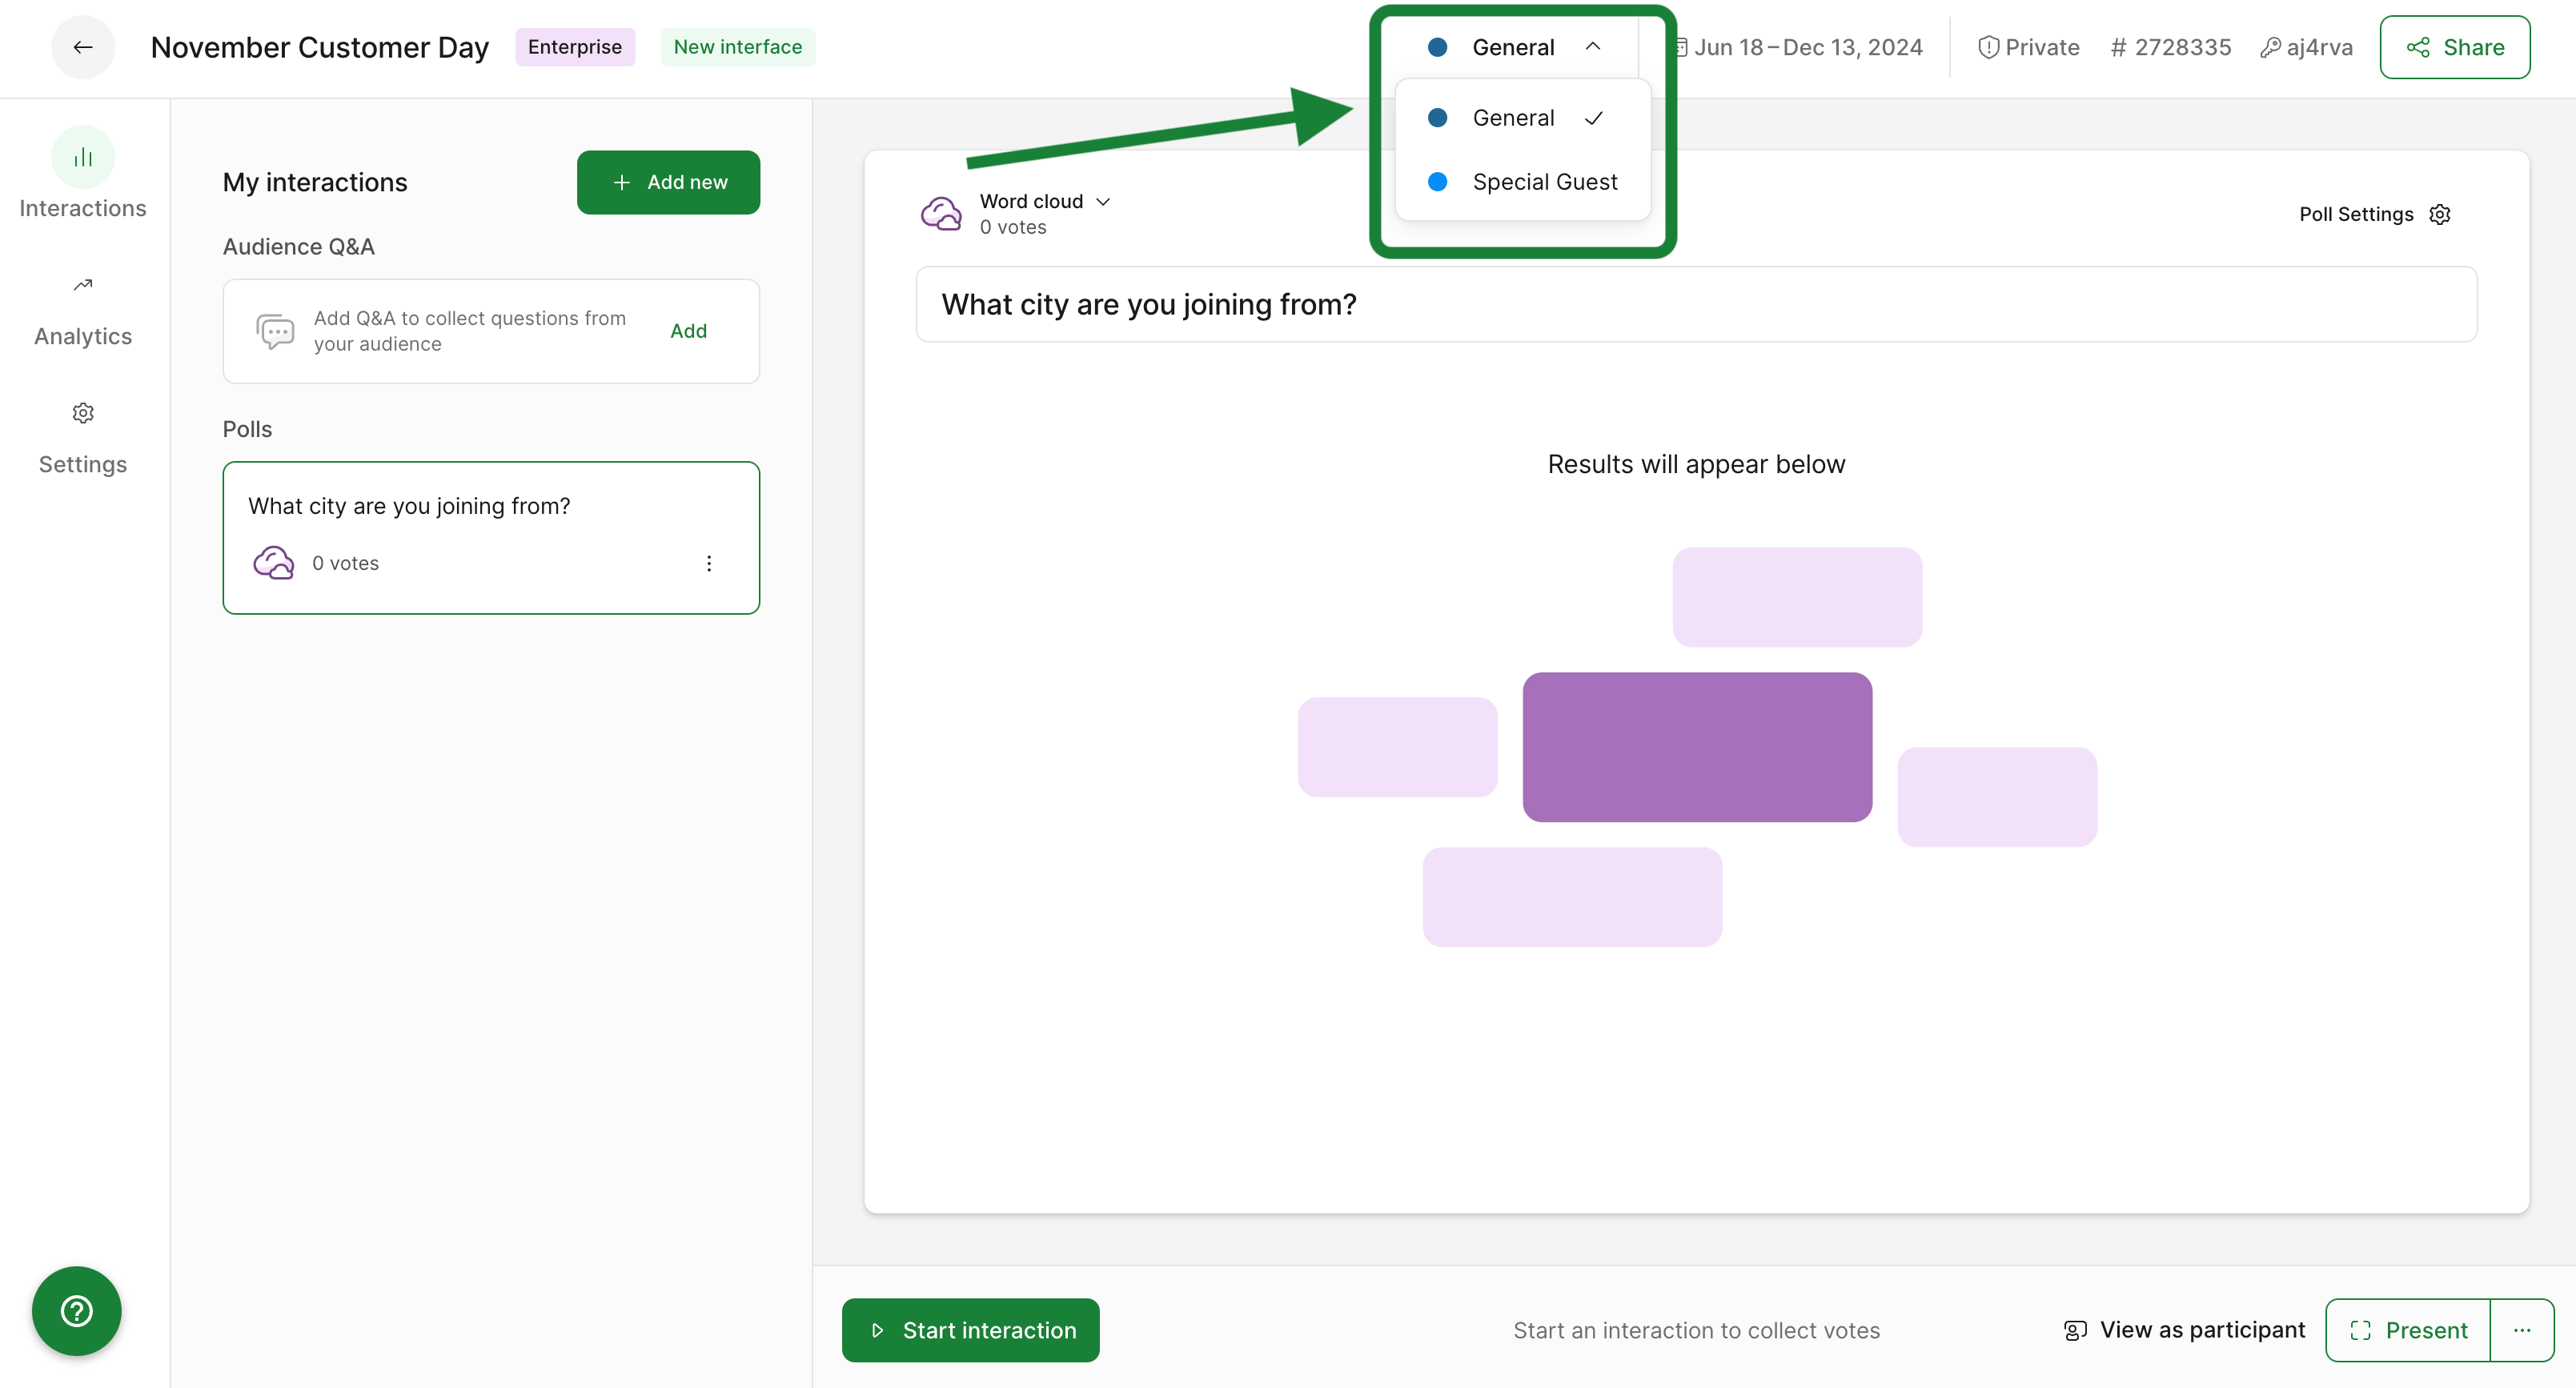
- Go to Settings
- Click Multiple rooms under the General tab
- Create and name your rooms
- Hit Save
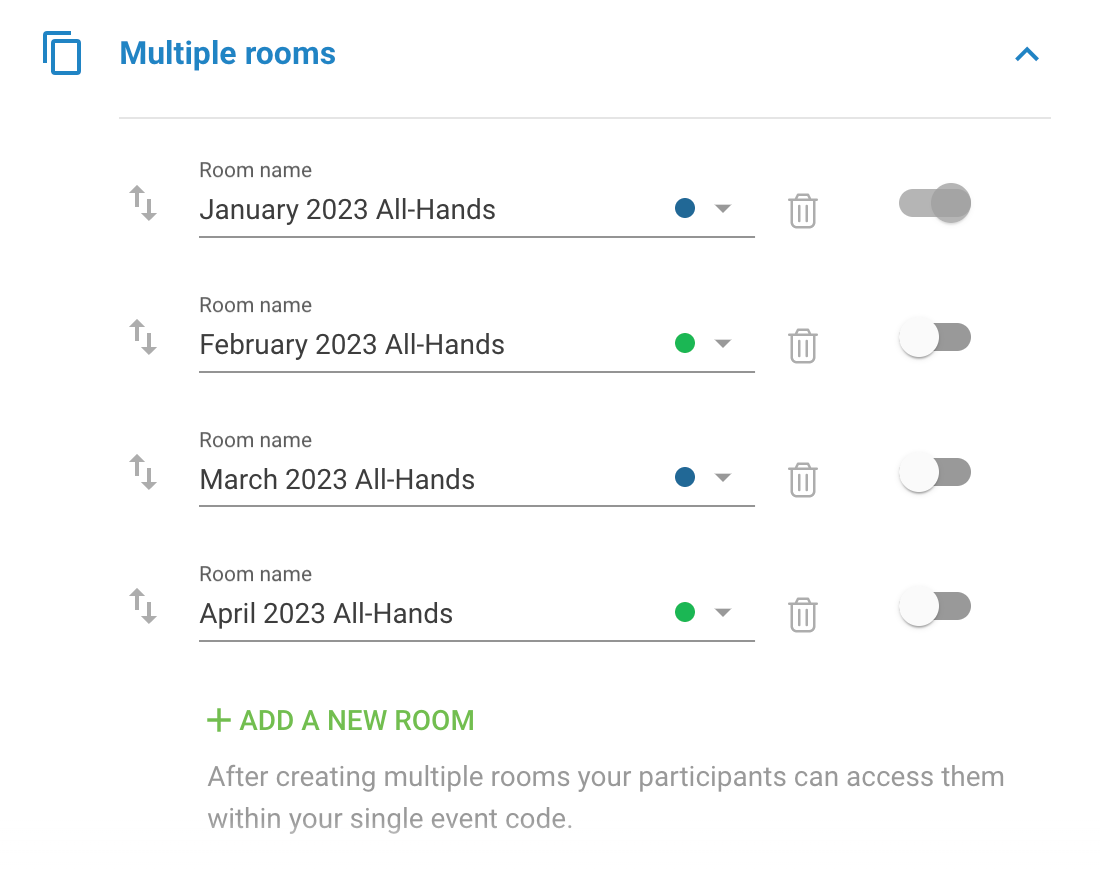
Use the toggles to disable/enable your rooms at any time. Only enabled rooms will appear for participants.

Depending on your use case, you can name your rooms based on the meeting date, session topic, or audience group.
You can also change the color based on your company branding or your own preference and reorder the rooms if needed.
To switch the room you’ve viewing, click the room title at the top of your page and select a different one.
Use multiple rooms in Webex for parallel sessions
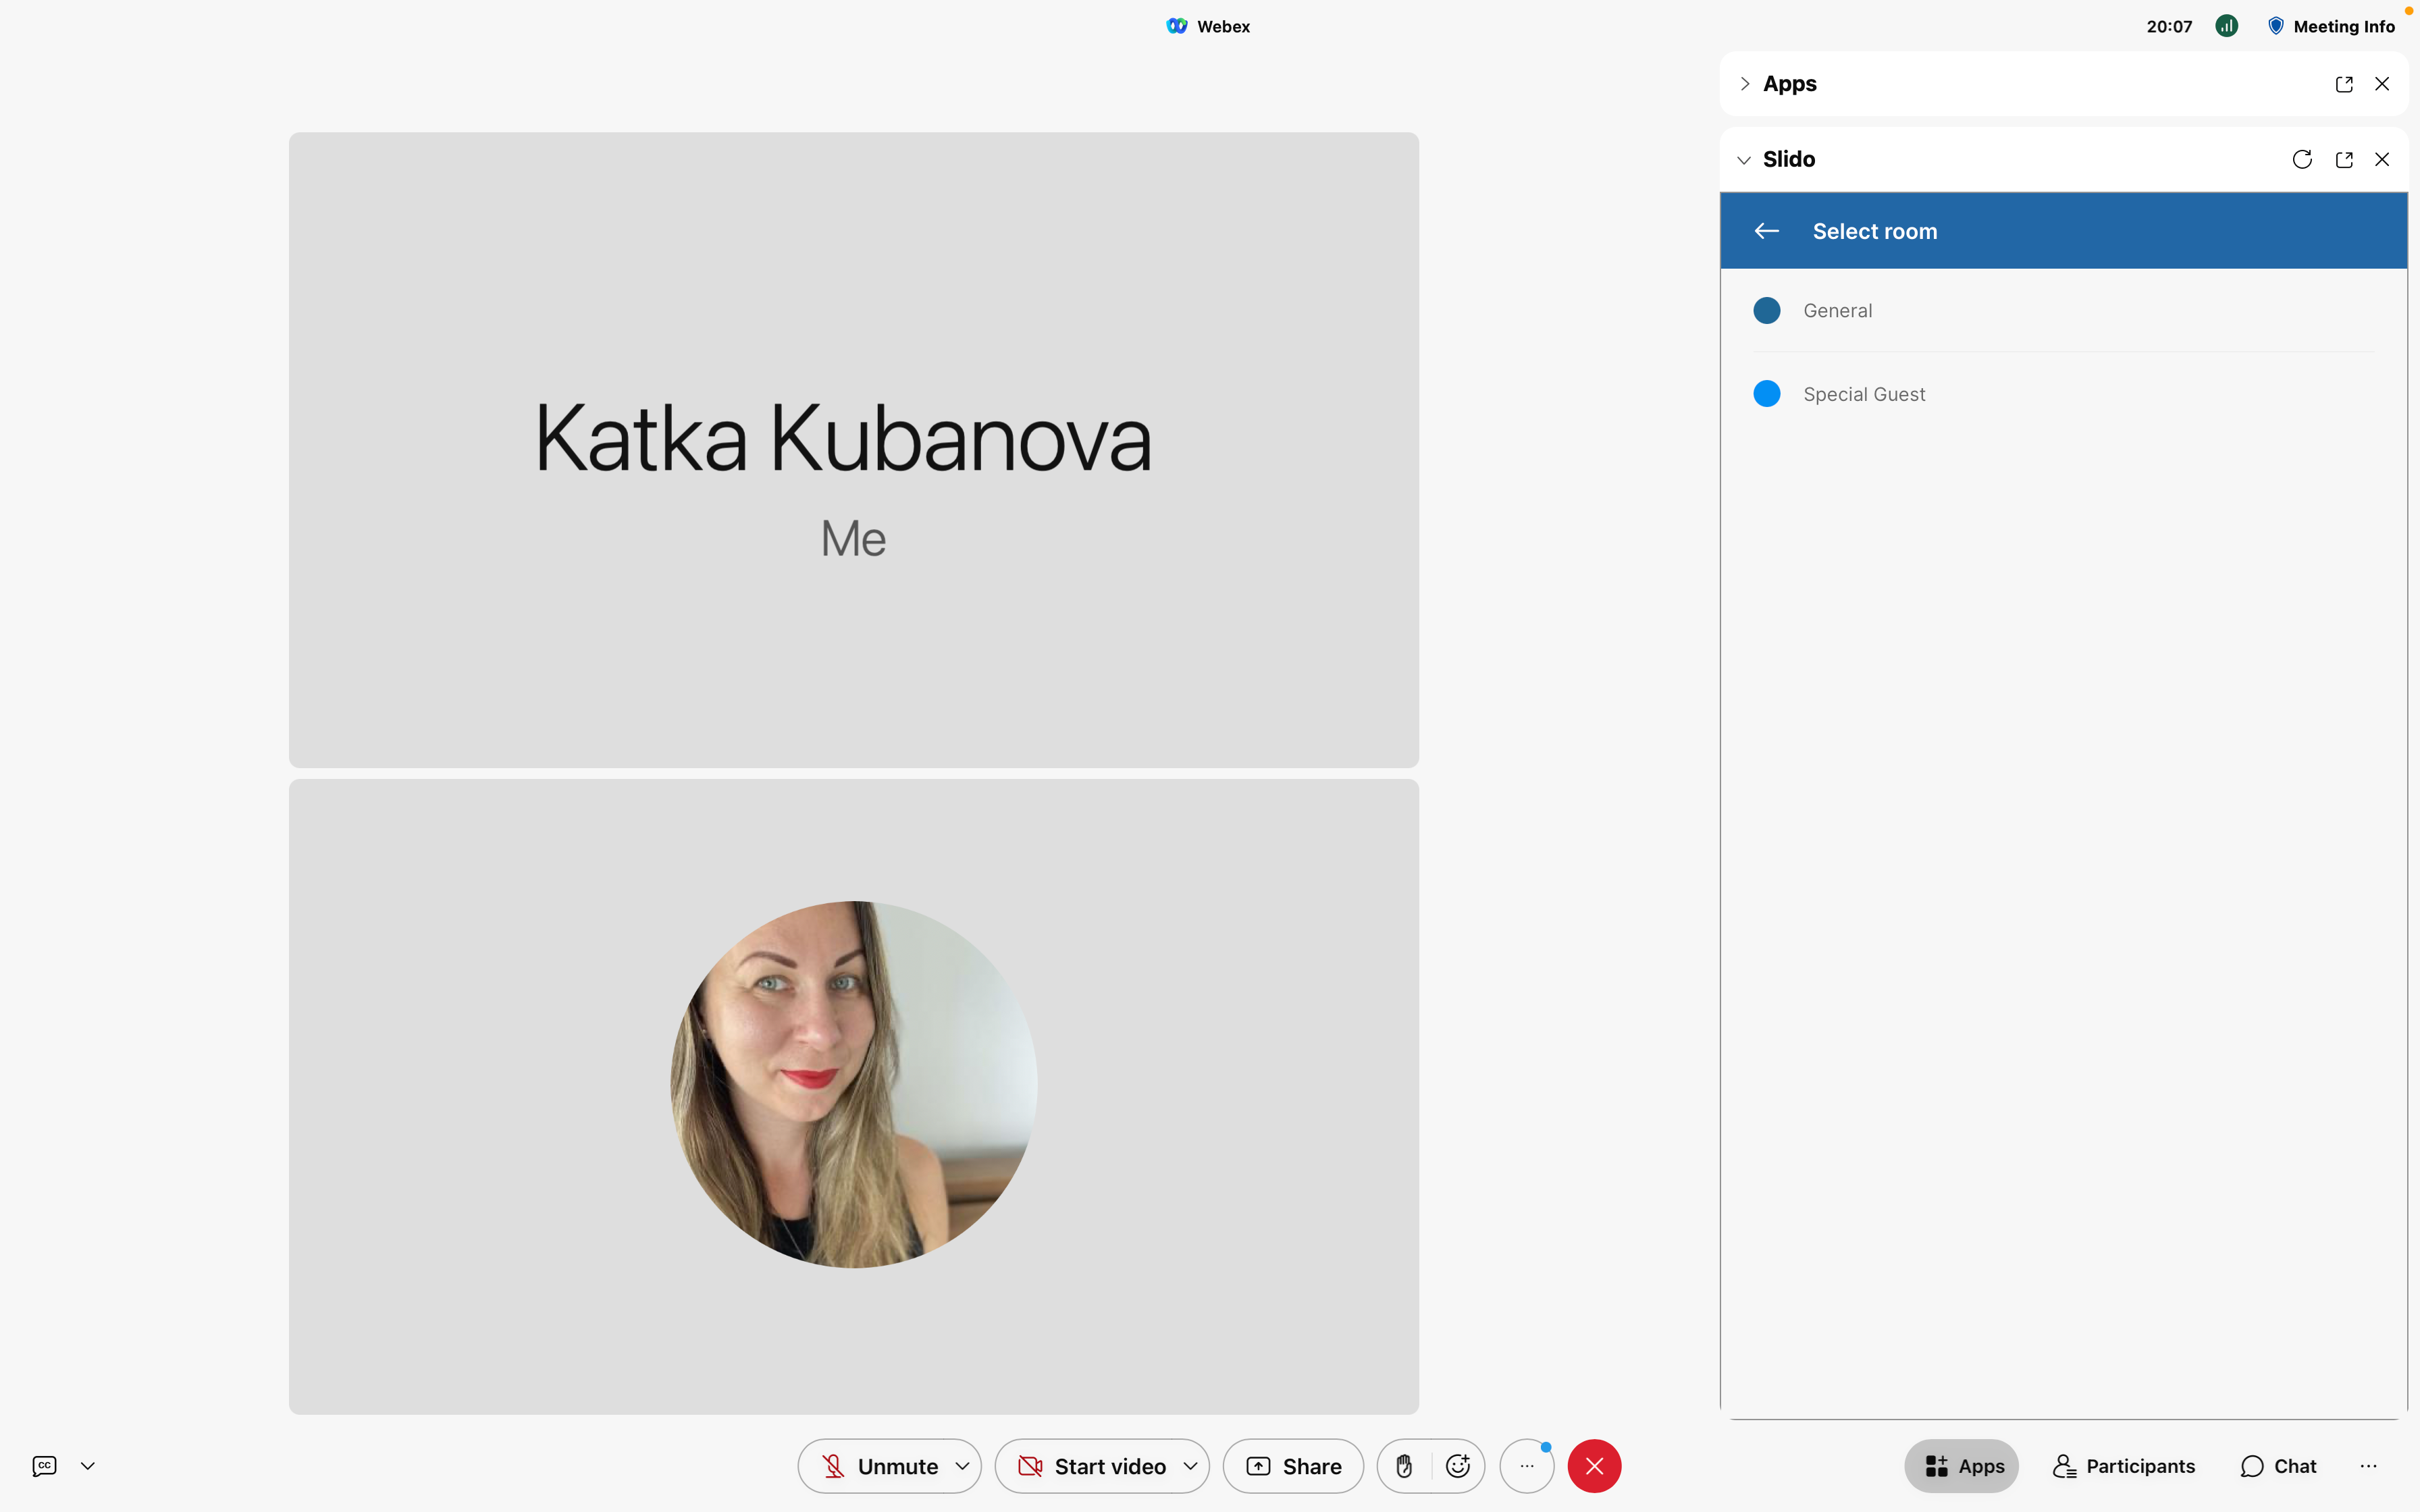
Before opening Slido in Webex, make sure you’ve enabled your rooms at slido.com first. Only active rooms will show in Webex.
As a webinar or meeting host, or as anyone launching Slido in a Webex meeting, you’ll see all active rooms in the Slido sidebar.
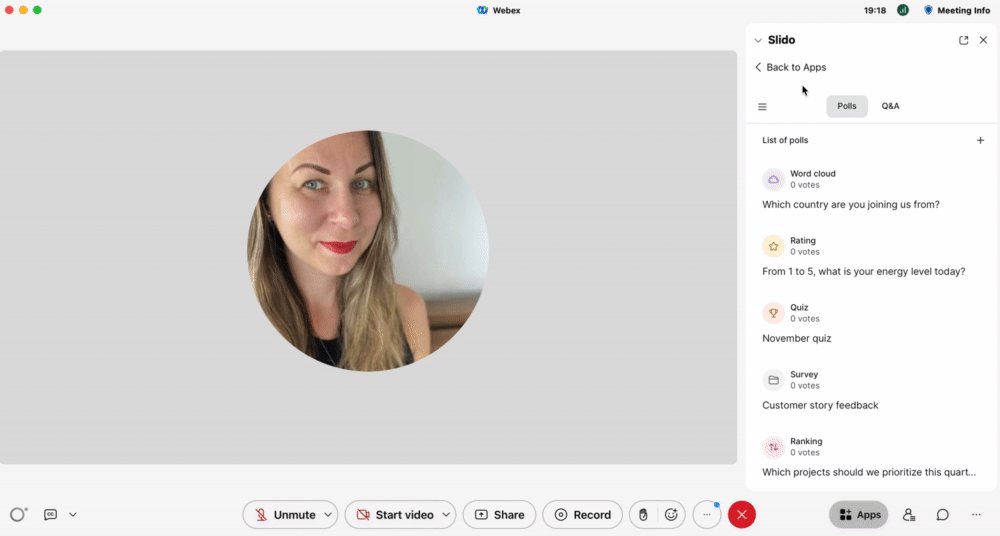
Your participants will be automatically asked to select the room once you start a poll.
If only one room is activated it will show automatically and the room selector won't display for either yourself or your attendees.
Use Slido in Webex for recurring meetings
You can use a single slido for your regular meetings while keeping the polls and Q&A analytics separate for each of them.
Here’s how you do it:
- In General settings, set the dates to cover your preferred time period
- Create a room for each meeting or event based on the frequency
- Keep only the current meeting room active
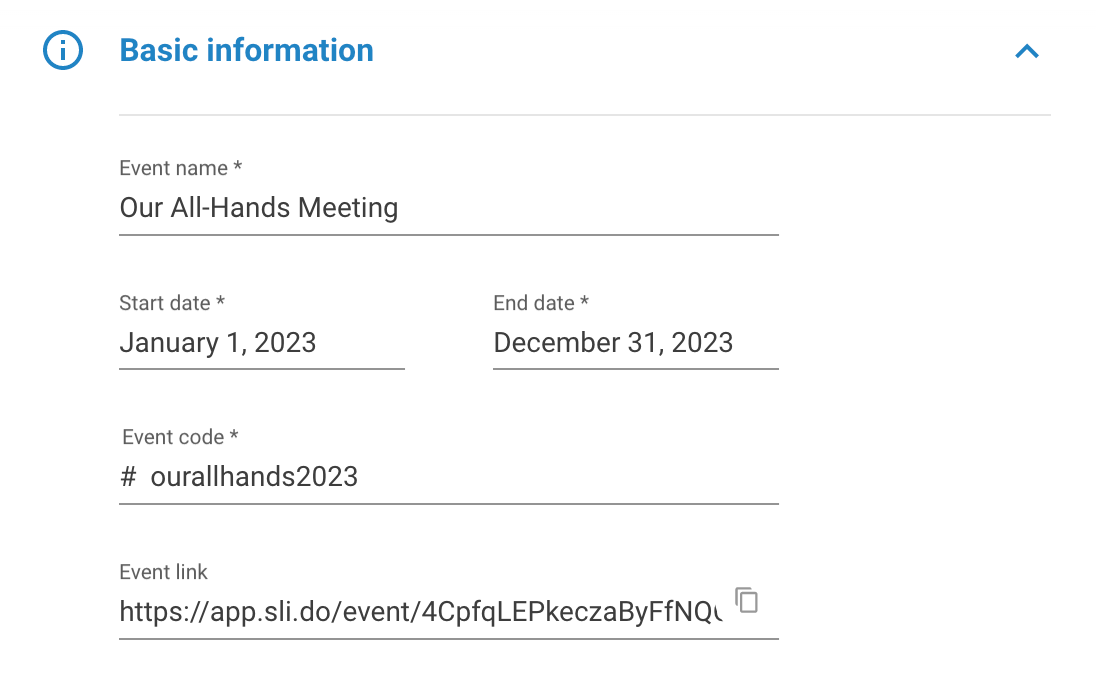
For inspiration, here’s an example of recurring monthly all-hands meeting:
- Dates are set from the 1st January to 31st December
- We customized the slido code to #ourallhands2023 and
- We named the rooms to reflect the month and type of the meeting: January 2023 All-Hands
The active room will automatically show for both you and your meeting participants when you add Slido to Webex. It will work the same way as if it was a slido without multiple rooms.
Useful tips:
- Tip 1: Protect your data
Make sure to secure your slido with SSO or passcode. You can also customize your passcode if preferred.
- Tip 2: Explore analytics and download your results
Once the meeting is over, go to your slido’s Analytics section at slido.com where you can view the overall data or switch to the individual room analytics.
You can also download your polls and Q&A results. There will be a separate sheet for each room in your MS Excel export file.
Curious about more?