



Where was your plan purchased?
A number of new US customers complete checkout through Cisco Store. Your Slido plan works in the same way, but billing and subscription management may happen in a different place.
- If your order confirmation or invoice is from Cisco Systems, Inc., follow the Cisco Store instructions.
- If it is from Slido s.r.o., follow the Slido instructions below.
- Not sure? Check the company named on your order confirmation or invoice.
Add colleagues to your annual subscription so they can benefit from Slido’s advanced features. Once you purchase additional member seats and invite people to join, they can create and manage slidos using their own accounts.
Available in any paid annual plan
In this article:
Purchase member seats
If you purchased your plan through Cisco Store, see this article. If you purchased directly through Slido, follow the instructions below:
- Log in and go to your Team tab
- Select Purchase seats
- Choose the number of seats and select Continue to complete payment
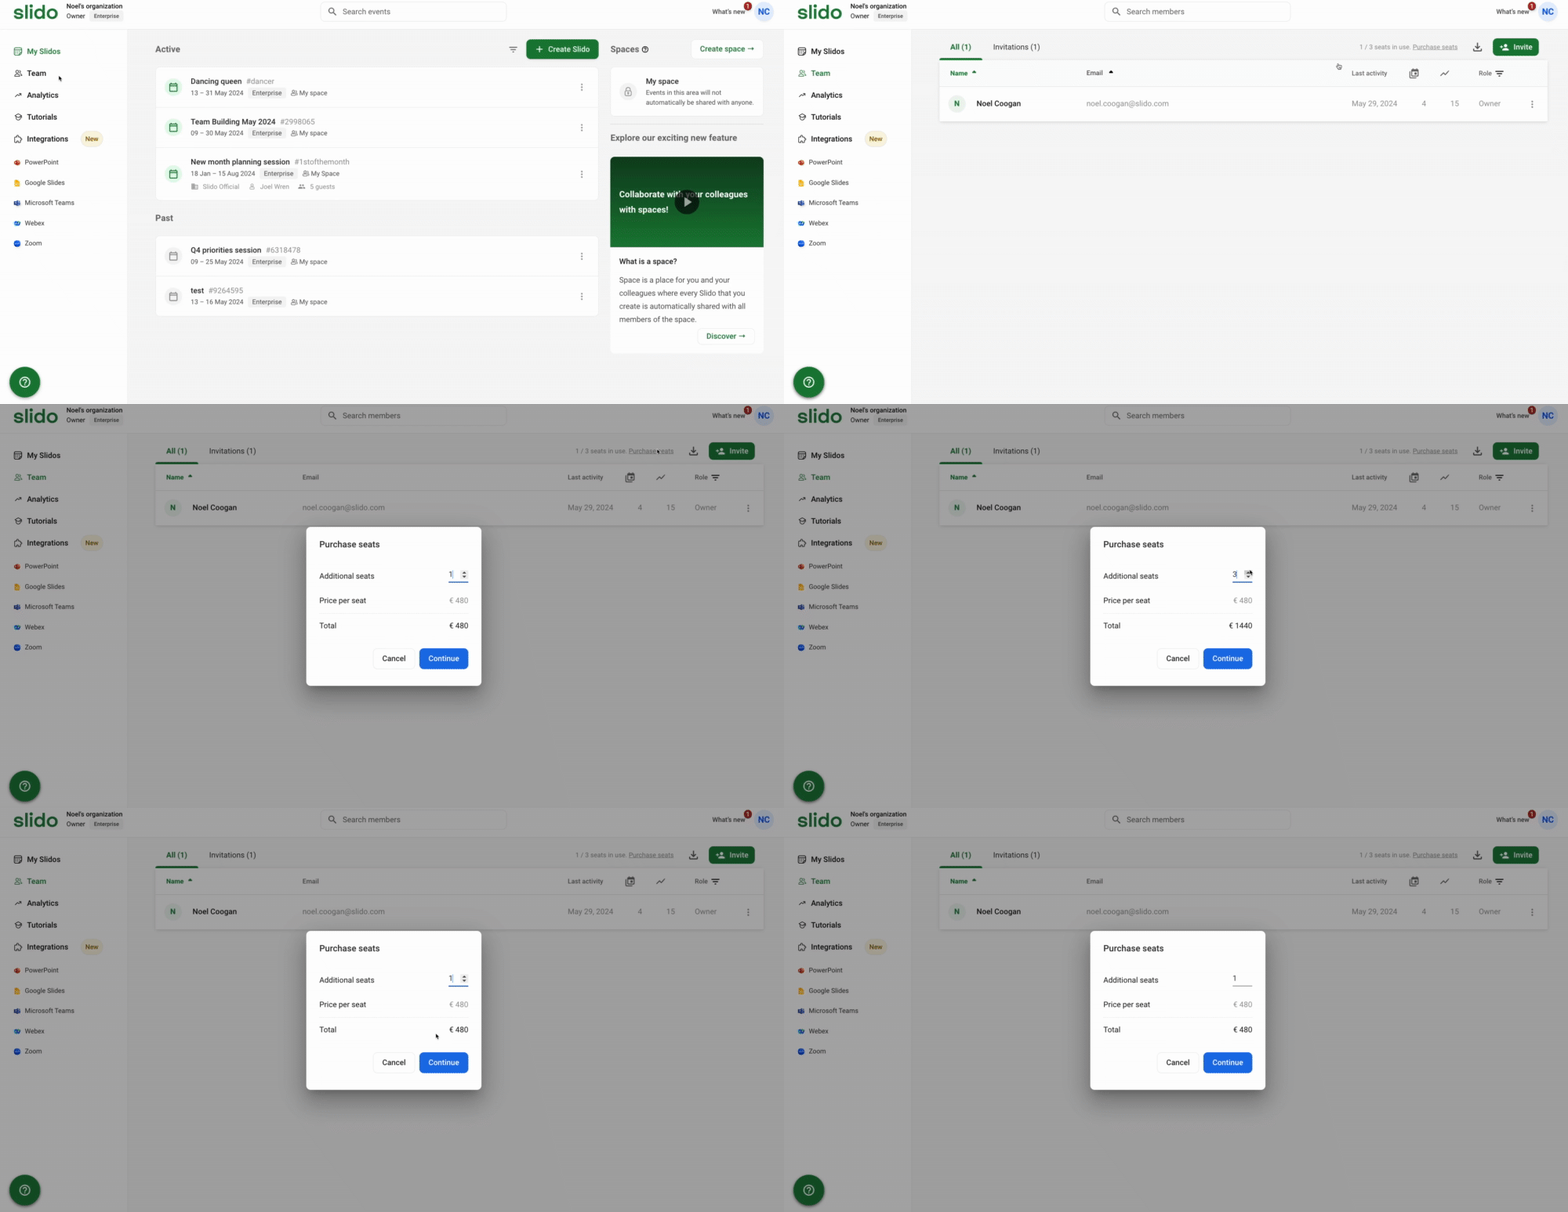
If you purchased your plan directly through Slido, additional member seat costs are not automatically prorated if you are making changes midway through your license, please contact our support team for assistance.
If you purchased your plan through Cisco Store, then your seats will be automatically prorated.
Invite people to join your license
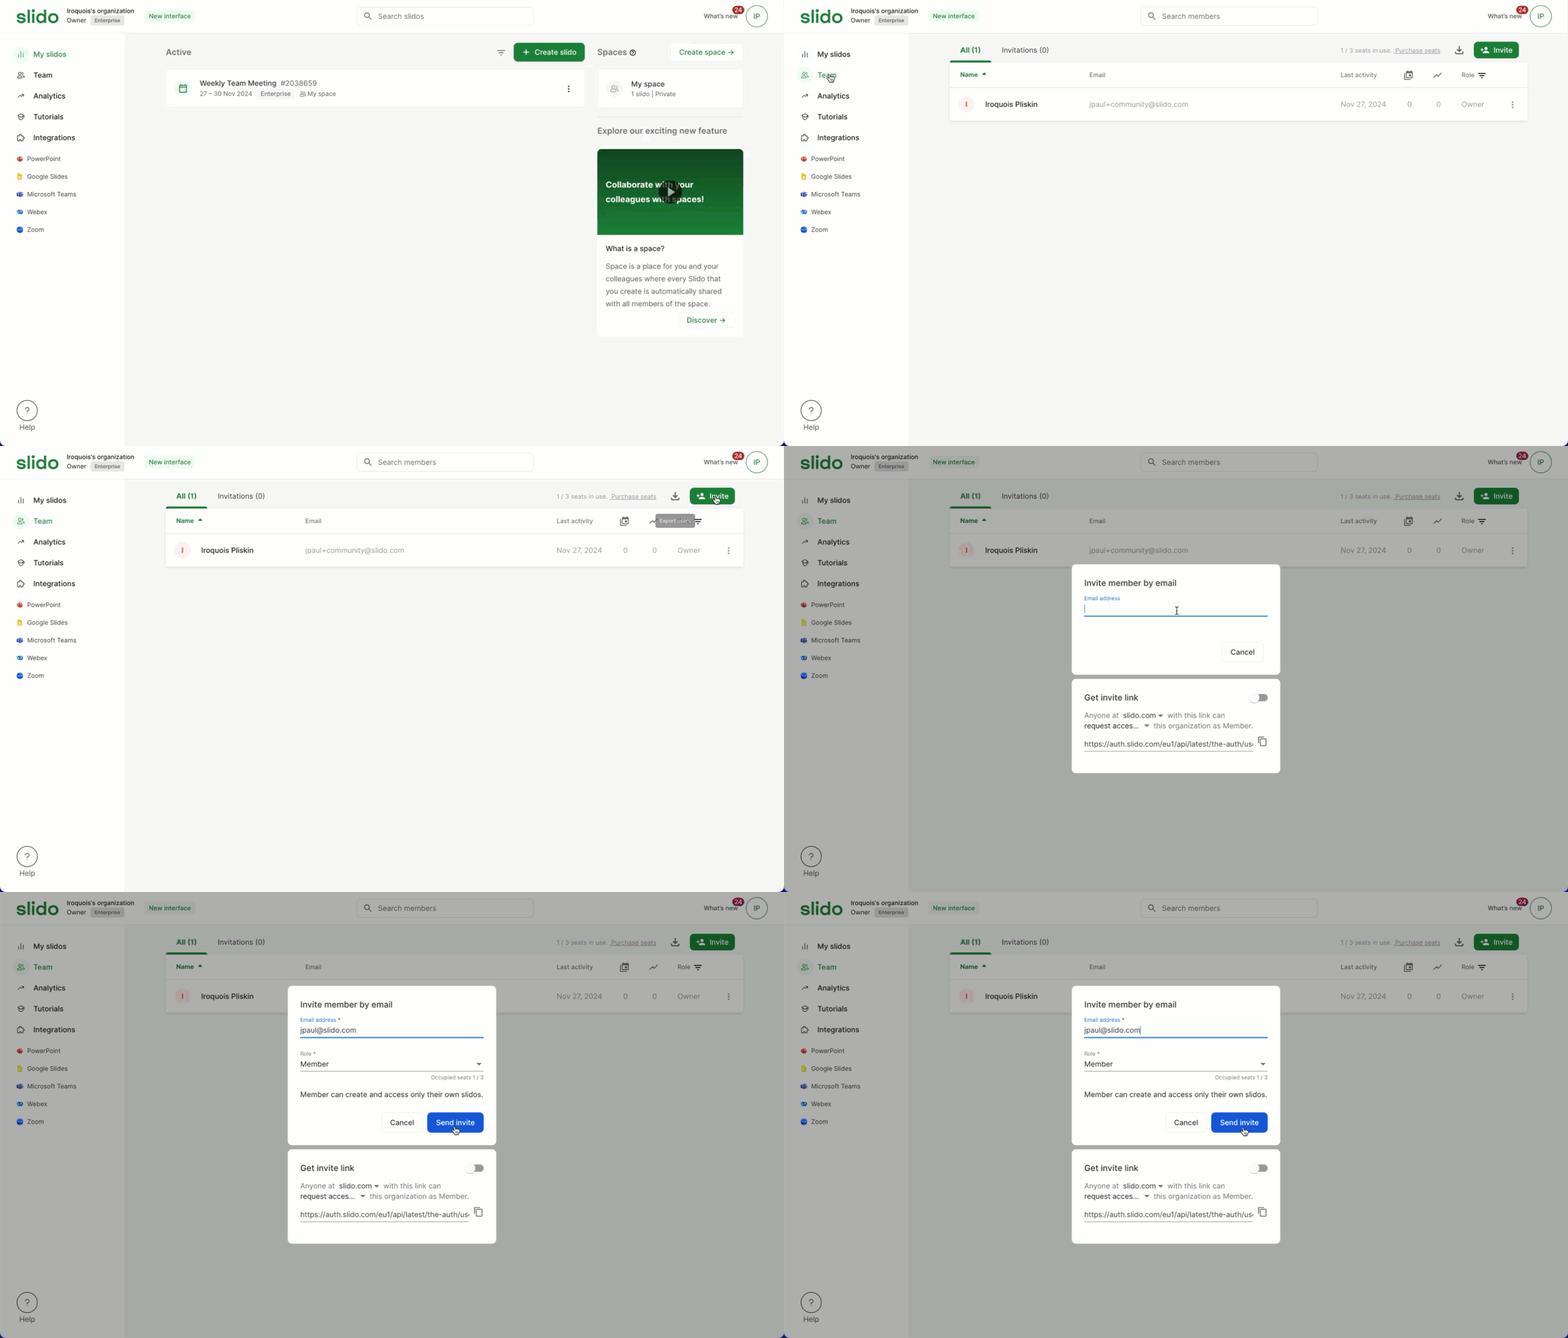
After purchasing member seats, invite your colleagues to join the license.
- Log in and go to your Team tab
- Click the green Invite button and enter their email address
- Select a role and click Send invite
Learn more about the different roles within Slido.
Use an invite link
When inviting members, you’ll have the option to enable an invite link. This link allows anyone with your specific email domain to either automatically join or request access to join your license.
Simply share the link with anyone you’d like to invite to the license.
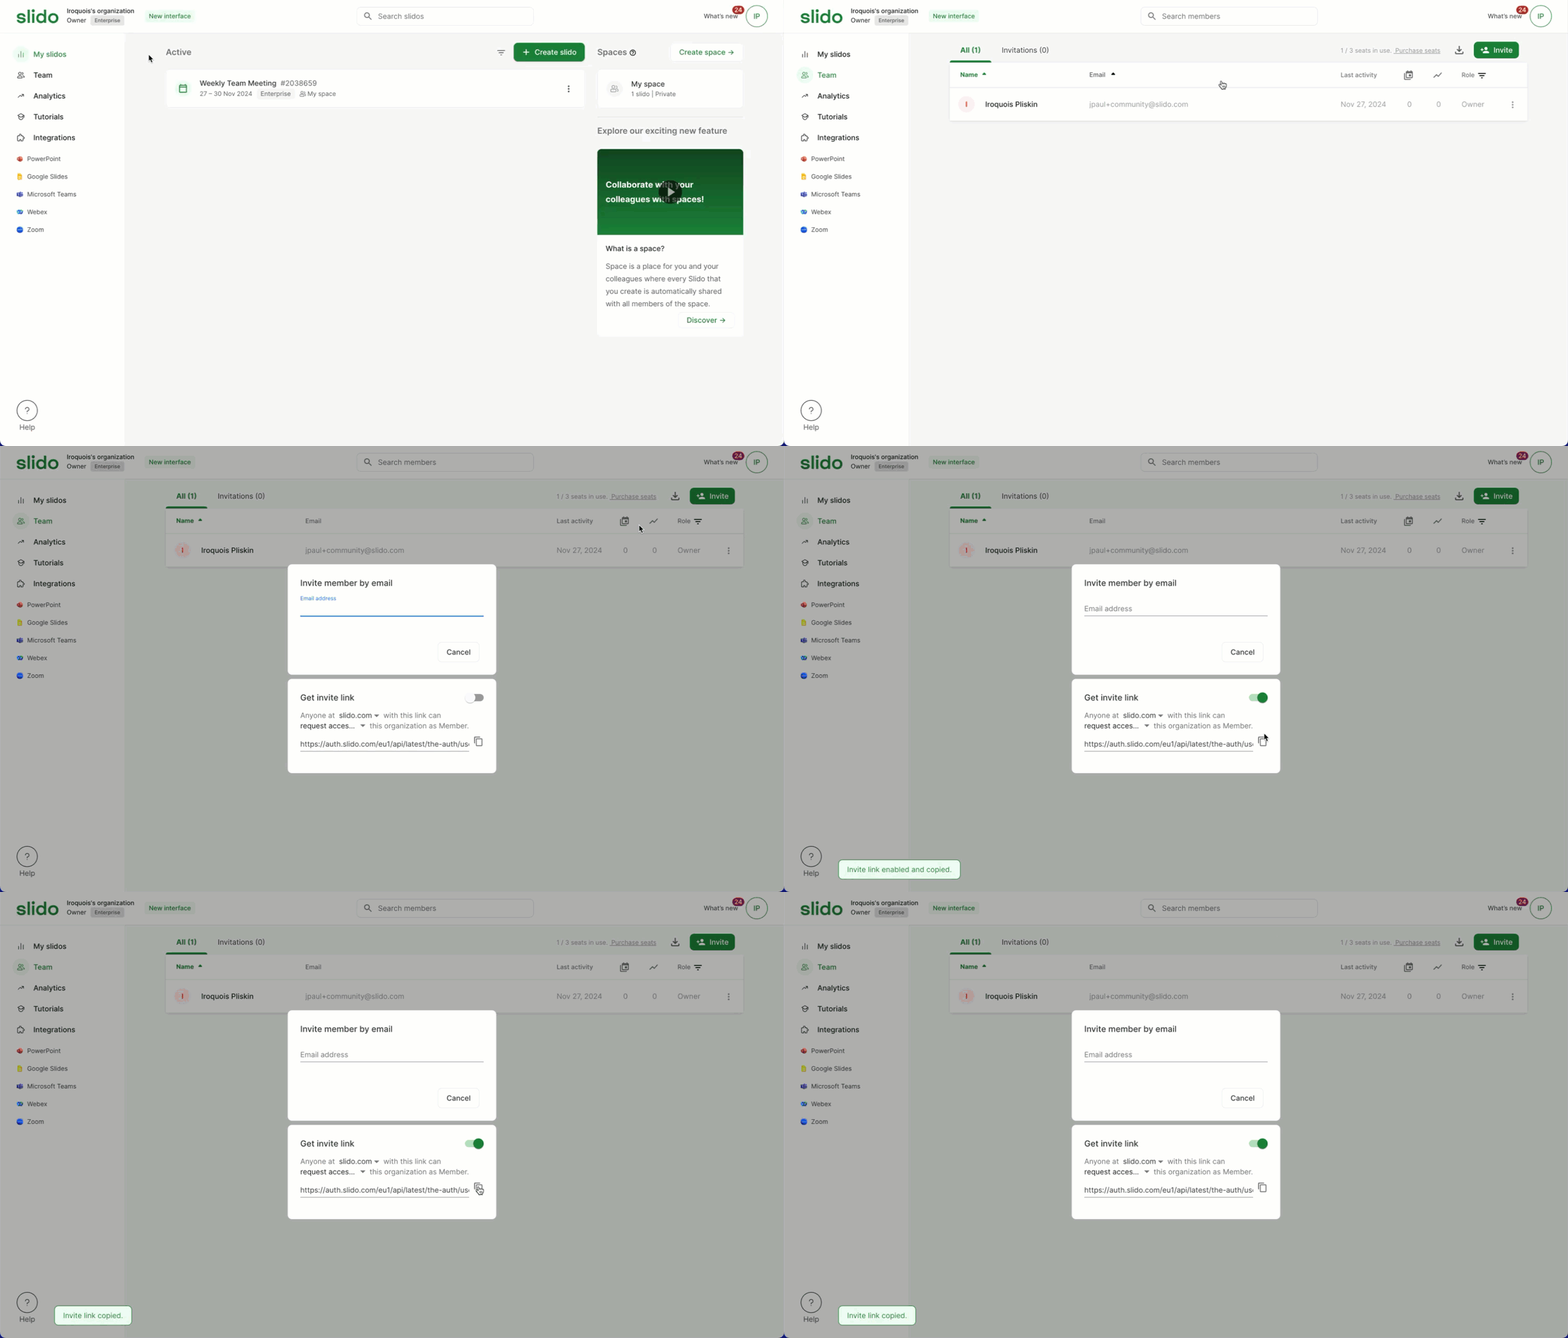
Pro tip: Add additional domains to widen the scope of who can join your license. Just click on the listed domain to add more.
Manage member access
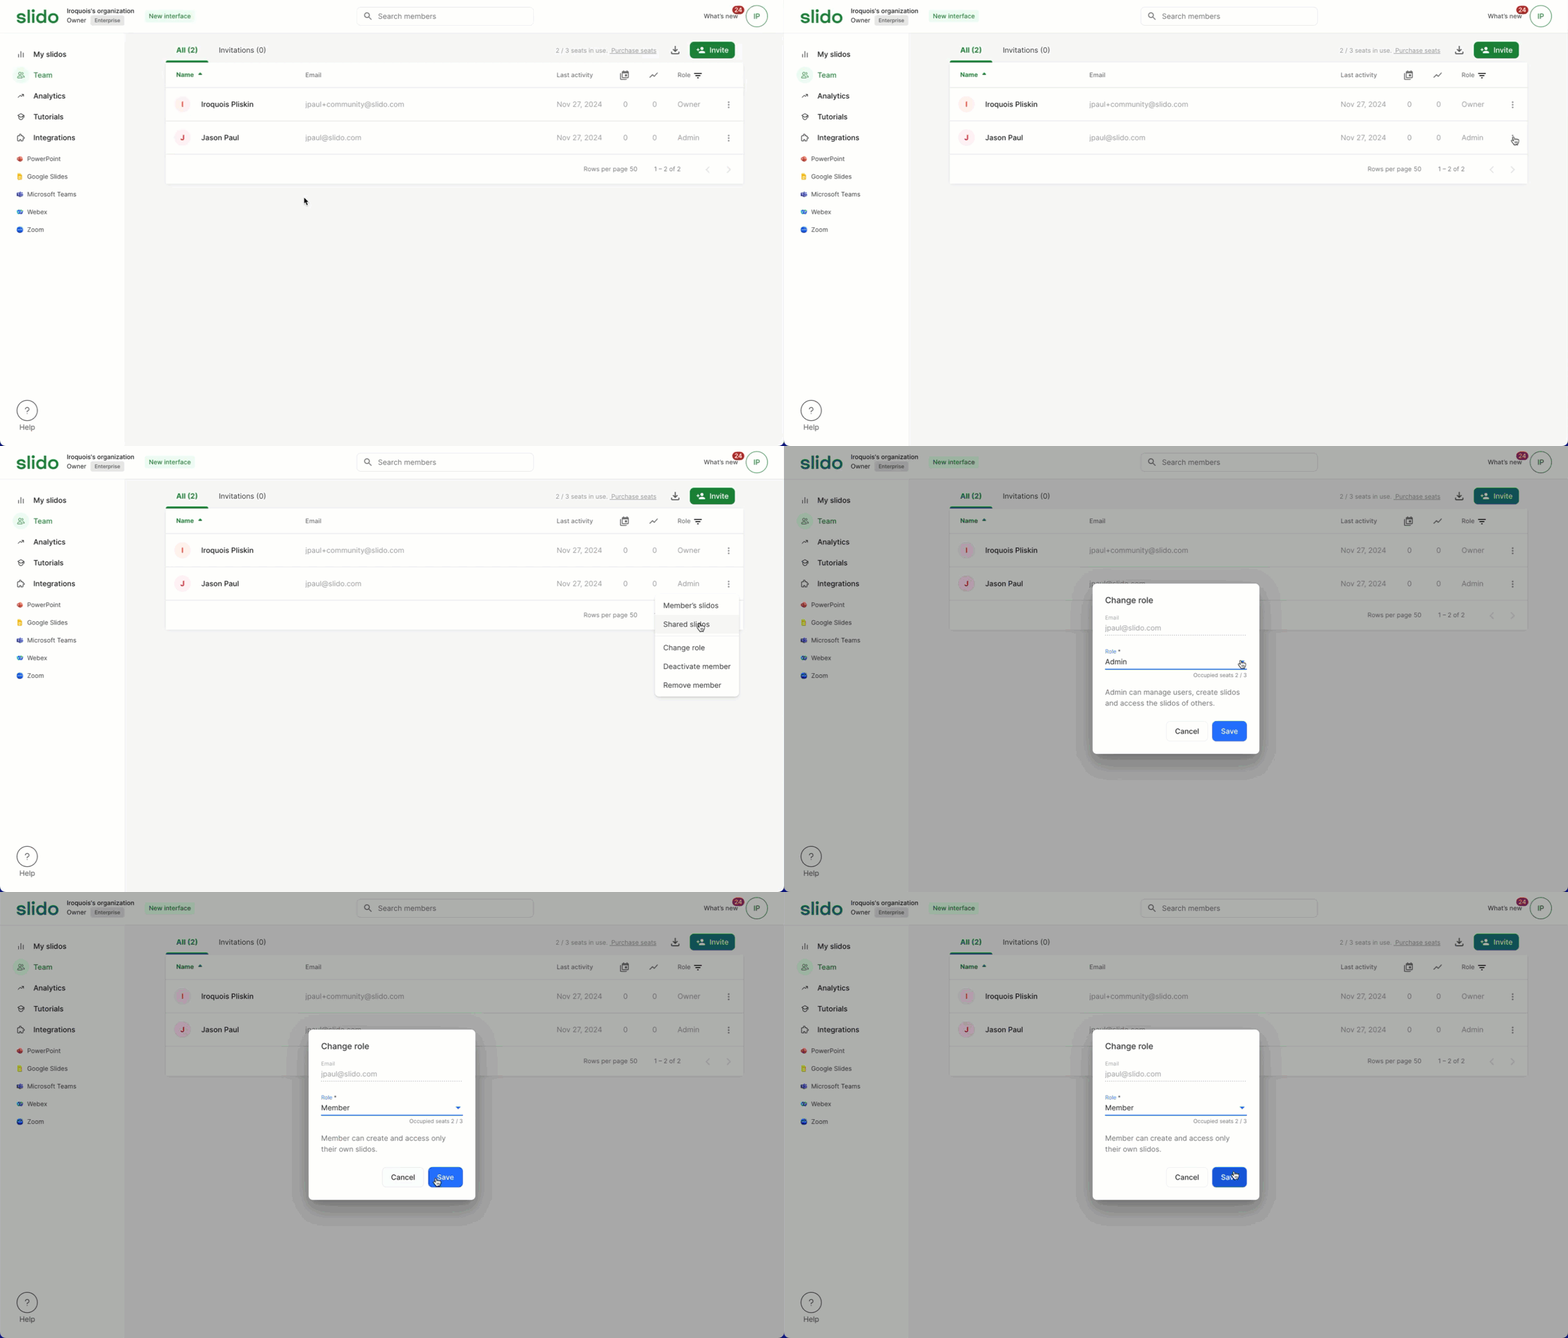
As a license owner or admin, you can fully manage access to the license. This includes editing member roles and/or removing access completely.
- Log in and go to your Team tab
- Select the three-dot menu next to any team member
- Observe the options you have for managing access (Change role, Deactivate member, Remove member)
See our member management guide for more details.
Curious to learn more?